Showing posts with label sewing. Show all posts

Monday, January 10, 2011

A Handmade Christmas

This year I tried to make things to give as presents. I love getting handmade things myself. There is something about knowing the work that someone went to make a beautiful thing out of a creative heart. I think handmade gifts are special and full of love. I wanted to share this with others this year. I wanted to share here what I made and where I found the ideas.

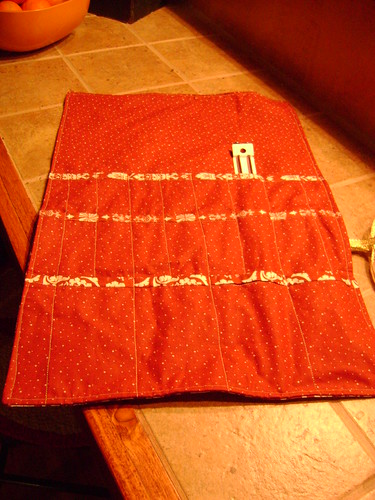
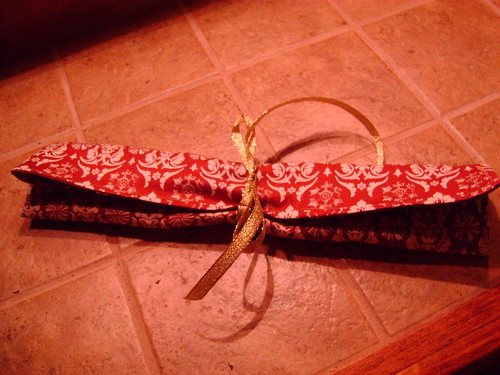
I have two knitters in my life and stumbled across a tutorial on making a knitting needle case...PERFECT! This was really not difficult to make and I was so happy with how it turned out. I found the idea on the blog Multicrafty. The actual tutorial can be found HERE.
Knitting Needle Case

Knitting Needle Case

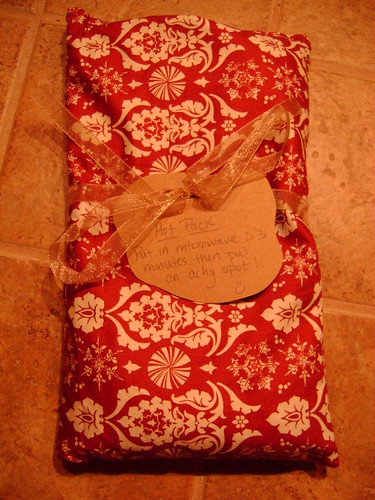
When I was a preschool teacher I received a Hot Rice Pack that was handmade. It is one of my favorite things to use when I am not feeling well. I found a tutorial on line for making these. They were insanely easy!!!! I foresee many more of these in my future. The tutorial I used is HERE on the Pie Birds, Buttons and Muddy Puddles blog.
Hot Rice Pack

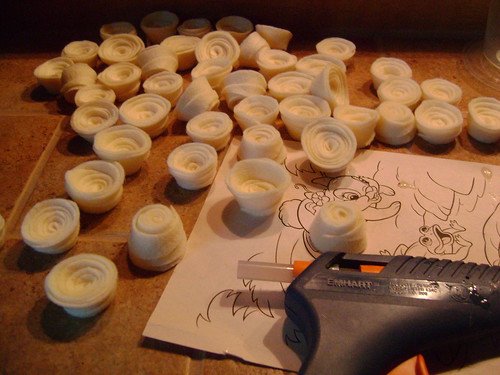
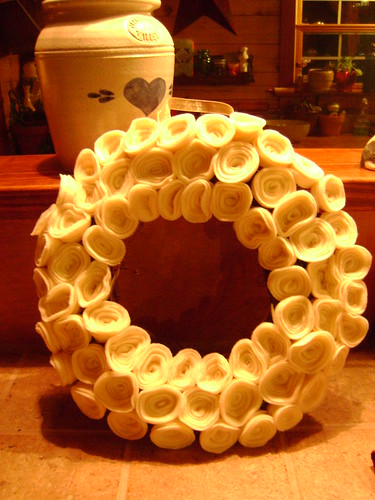
I also made a few of the Felt Rose Wreaths to give as gifts. This is such an easy project and can literally be done in one evening. If you don't sew, this is a good crafty project for you as long as you are armed with good scissors and a hot glue gun. I got the idea from The Pretty Poppy on THIS blog post.
\Rose Wreath

Rose Wreath

Each year I want to make something my for my girls with my own hands. This year I decided on handmade dolls. I found an incredible book called Wee Wonderfuls: 24 Dolls to Sew and Love (which my mother-in-law ended up buying for me for my birthday after I raved about it). It is awesome and has such fun ideas in it. I made a boy doll and a girl doll for my girls. They love them which makes my heart happy!
Christmas Day
I made one more thing but forgot to take a picture to share here. I made an iPod cozy for one of my nieces using THIS tutorial on Sew, Mama, Sew!

Sunday, December 12, 2010

Pillowcase Dresses

I have been in love with pillowcase dresses for a long time. I have a beautiful vintage pillowcase just waiting to be made into a summer dress for my oldest daughter. Alas I kept procrastinating and/or forgetting. The other day I was in JoAnne's and decided my girls needed matching Christmas pillowcase dresses and it was time for me to do it! So I picked out some fabric. It wasn't exactly what I wanted but it works and they turned out cute.
Christmas Sisters
I used the tutorial found HERE on Naptime Crafts. I added a trim to the bottom of their dresses to set them off. Between the main dress fabric and the trim fabric I sewed on a red pom-pom trim which really added to the dresses, I think.

I am happy with how they turned out. I especially LOVE seeing my girls in something I made for them. Obviously since it is winter and blustery out we added the red leggings and white turtlenecks.

Monday, November 22, 2010

Birthday Gifts

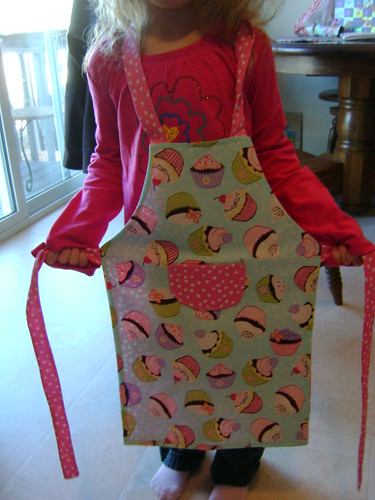
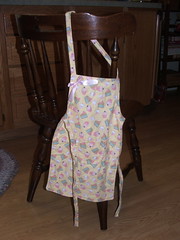
My girls were invited to a birthday party a couple of weeks ago. Our budget is pretty tight with Daddy in school so I decided to make a couple of things to give to the birthday girl. I made her a little cupcake fabric apron to use when she helps her mommy in the kitchen.
Apron
I like to make the neck loop a little big so they can grow into the apron. I just knot the excess so it fits better.

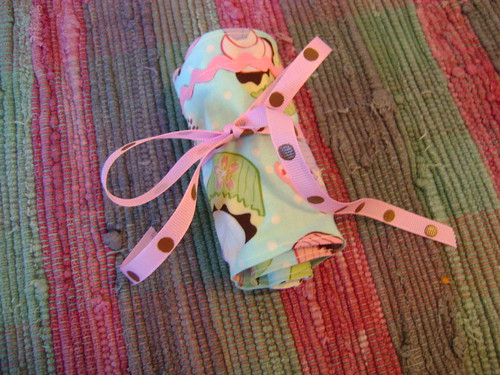
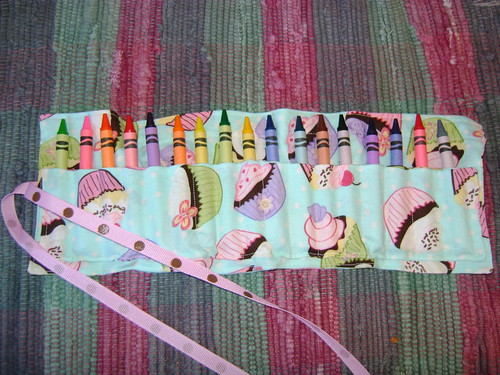
I also made her a little crayon roll out of the same fabric. I am not really that great of a seamstress when it comes to following a pattern. I like to think through the project and just kind of do it my own way and that is what I did here. My mother-in-law had made my oldest daughter one a few years ago so I just looked hers over well and came up with my own design.
Crayon Roll
I was so happy with how it turned out and it was really pretty easy.
Crayon Roll
There is something about a handmade gift that is so fun to give and to receive. These two gifts didn't take much fabric so I was able to use things I had on hand. They also really didn't take alot of time to make. Handmade is great!

Friday, October 29, 2010

Simple Crafting

I have made a few things over the past couple of weeks that I wanted to share with you because they were ridiculously easy.

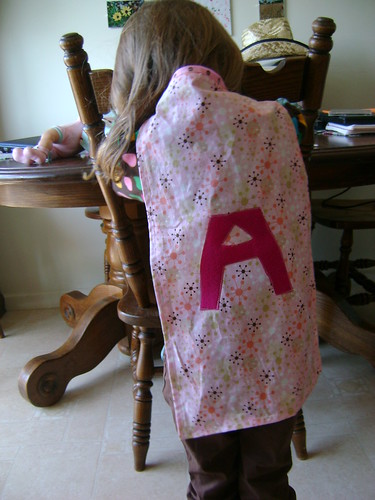
The first were super girl capes for my girls. I just cut out a rectangle piece of fabric, angled it a bit going up the long sides. Then I stitched a hem all around it and sewed a piece of ribbon to the top for them to tie their capes on with. I also cut their initials out of felt and sewed those to the capes. EASY!
Super GirlSuper Girl
My oldest daughter is OBSESSED with baby dolls (well, so is the younger one) so I made her a sling to carry her babies around in. I do have to admit I was so excited for her to play with this and she hasn't been that into it. I'm hoping that over time she will.
Baby Wearing
This again was so easy! I just cut a large rectangle out making sure it was long enough to go around her like a baby sling and wide enough to fold in half. Then I sewed the long sides together and then the middle seam. EASY!
Baby Wearing
The last thing I made was trick or treat bags for the girls to use on Halloween and in the years to come. I got the idea from this post Kayla Aimee wrote (If you don't read her blog, you need to. She is HILARIOUS!) and she got the idea from HERE.
Trick or Treat Bag
I am in love with banners/buntings...whatever you call them so I went with that for my bags and because I try to stay away from the "spooky" side of Halloween. I tried out Liquid Stitch for this project because sewing things on to a canvas bag with the sewing machine is too frustrating. This was awesome stuff. It was messy on the fingers but it washed right off. It has held up through one night of trick or treating so far too! I made sure to put the glue as close to the edge of the fabric so that it would not fray which seems to have worked. To finish the bags I stenciled the word "CANDY" across the top with orange paint.
University Trick or Treating
Love these!

Thursday, August 5, 2010

Buntings

I AM IN LOVE WITH BUNTINGS! I have been looking at them online for ages, wanting to make some but I hadn't. Then my oldest daughter's birthday came and I brought out the scrapbook paper, hole punch, yarn and went to work. It was so easy! Why did I think it wouldn't be? It added just right amount of pop and festiveness that I wanted for our simple little party.
Paper Bunting
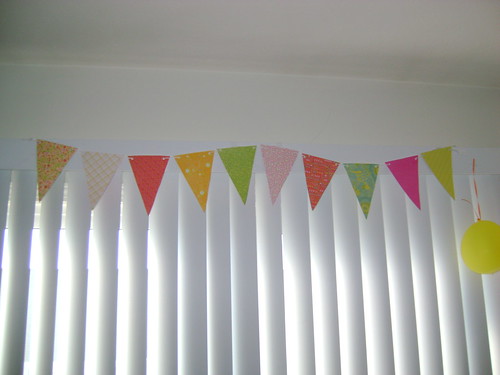
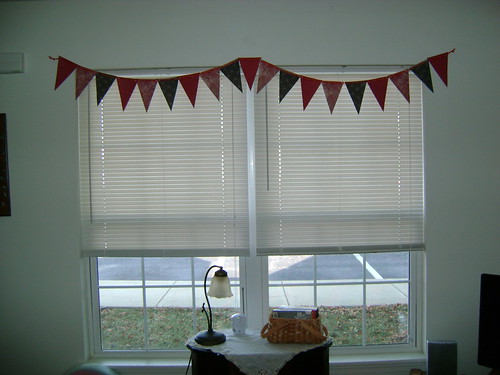
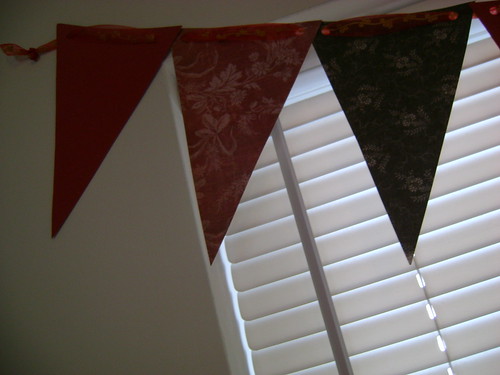
So then I looked at the big window in my living room that has no cute curtains and thought, "Hmmm...Why couldn't I make a more elegant paper banner and hang that over the window?" I did and I love it! We live in an apartment so I am trying not to put too many holes in the walls so the bunting is perfect. I just have it taped up and it looks so simple but elegant.
Paper Bunting
This space needs something more but it really helped it not look so plain and expansive. This is so cheap too! I found the beautiful papers at JoAnne's. I had the ribbon already so it was only a few dollars to decorate!
Paper Bunting
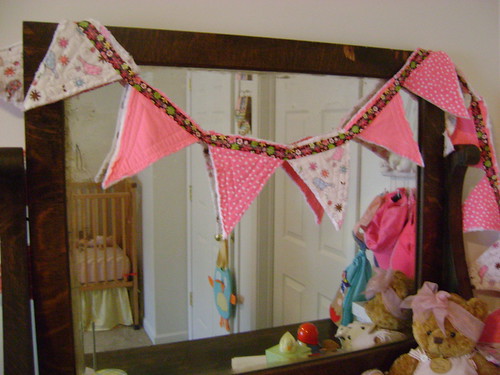
This all spurred me on to finish a fabric bunting that I had started last January but got overwhelmed and quit. After looking at different ideas online I came up with a way to really simplify the bunting I wanted to make for the girls' room and LOVED it. It again was super easy and cheap.
Fabric Bunting
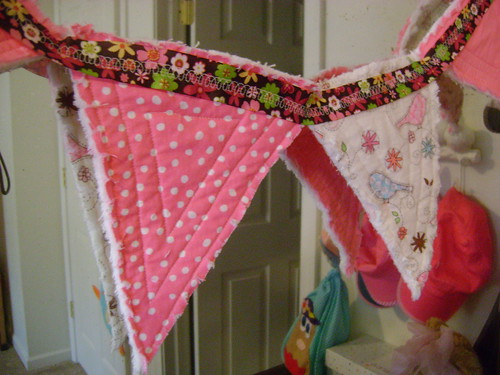
I used 3 different fabrics and cut out a bunch of triangles using a template. I also cut triangles out of batting. I then sandwiched a triangle of batting between two pieces of fabric and sewed around the triangle edge. Then I sewed a few more inside. I did not worry about being exact. I was totally going for a shabby, scrappy look.
Fabric Bunting
Next I cut around the outside seam leaving about a 1/4 inch edge. Then snip all the way around the triangle just to the seam. Throw the triangles in the washer and then the dryer. When they come out, the edges will be frayed to give them a scrappy look. I then sewed all the triangles together with a long piece of ribbon.

I love how it turned out and want to make more! I have yet to decide where I will actually hang this in the girls' room. That is why it is draped over their mirror, but I kind of like it there for now.

I love buntings!!!!! I love crafts that do not have to be exact! That is so freeing!

Saturday, July 31, 2010

Birthday Crafting

I am still here. Summer has been an especially hectic time for us. It started off with being in a horrible car accident over Memorial Day weekend. God totally watched over my family and only by His grace did we all get out with no major injuries. My hubby and I could hardly move for a few days but we healed up pretty quickly considering what could have been.

We bought a new-to-us vehicle, went on a few trips to see family, sold our house that had been on the market for 10 months, and in between all of that the girls have been sick off and on. We have battled Hand, Foot, Mouth Disease and I believe my youngest had Roseola.

Just last week my oldest turned 4! I can't believe it. I was determined to do some sewing for her for her birthday and I did. It felt so good to get a bit crafty again. It had been so long. I think my girls can play in the basement play/sewing room without killing each other for a longer period of time now. That helped alot!

So what did I make? Well, let me show you....

The first thing I did was find a small white T-Shirt at the Dollar Store and appliqued a number 4 out of vintage kitty fabric on the front. I added some pink ric-rac trim to the collar. Here's a piece of advice....When adding ric-rac trim to the collar of a t-shirt, do NOT sew it around the entire collar. The excited birthday child will not be able to squeeze her 4 year old head through the hole opening. You will then have to rip out half of the trim while your family is waiting to go out for lunch at Olive Garden and you will be so embarrassed for not thinking of this beforehand. So there! Free advice!
4 Years Old
I also wanted to make a cute headband for her to wear with her birthday shirt. I found this great tutorial on making Scrap Flowers and went with it. I also sewed together two long skinny rectangles right sides together, turned them right side out, and sewed a finishing seam all around the outside. WAH-LAH...a head band that you can tie around your child's head. I hot glued my scrap flowers to the head band and felt all proud of myself. I think it turned out very cute.
4 Years Old
As you probably know I make and decorate my girls' birthday cakes. I have so enjoyed this tradition. This year since Peanut was old enough to decide what she would like on her cake, I came up with 4 choices for her from ideas I found online. She got to choose from Strawberry Shortcake, Mr. Potato Head, Curious George and Cookie Monster. She picked Mr. Potato Head which actually became Mrs. Potato Head when I was decorating it. This was such an easy cake because I just used a star tip and grass tip to decorate then Potato Head pieces. So easy and so cute.
4 Years Old
For the actual cake I made a homemade Pink Lemonade cake. I discovered this recipe a few weeks ago and knew I wanted to try it out for Peanut's birthday. It was so much yummier than something out of a box. Yum!

When she made her decision I remembered a tutorial I had seen online for felt Potato Heads so of course, I had to make one for her in honor of her cake choice. I also made a drawstring bag for her to keep the pieces in. I used sticky velcro on the pieces but have realized very quickly I am going to need to actually stitch them to the felt pieces.
4 Years Old
I had so much fun making things for Peanut. It spurred me on to get busy on a bunting I had started making during winter but put aside. My triangles are currently in the dryer getting their perfectly frayed edges. I will be sewing them together hopefully tonight. Once the finished product is hung in the girls' room, I will post a picture. I am very excited to see how it turns out.

I also have a wreath and felt sitting on my kitchen table waiting to be turned into a something pretty to hang on my front door!
Friday, May 14, 2010

Inspiring

I checked this book out of the library a few weeks ago after reading about it on a blog. I fell in love. It is a great book bursting with fun ideas. I have been in a crafting lull and just not motivated to do anything with my sewing machine or crafting. Like you hadn't noticed due to the lack of posts on projects I've been up to.

This book filled me with excitement as I looked through the patterns and fun things to make. My in-laws were here visting for a day. She leafed through it and I told her how excited I was about this book and that I was hoping to buy it.

Wouldn't you know it....a week later this book showed up in my mailbox! Have I mentioned that I have a sweet Mama-in-law who loves to do little things like this? She is the best!

So today it is cloudy. Today I have no car to tempt me in running around town. Today I have my sewing area ready to go. Today I have a bunch of one yard pieces of fabric stashed away. So the real question is will I GET to sew today? Will my littles let me have some time? We will see. We will try. Hoping to be back with pictures of something that I created.

If you are a sewer you really should take a peek at this book. It is so fun and you only need ONE YARD OF FABRIC for all of the projects. That is what appealed to me so much. Fabric is so expensive but one yard, I can swing that. So grab a copy and take a peek or mention it to a loved one and maybe it will show up in your mailbox too.

Sunday, October 25, 2009

Laura

Peanut and I (and Daddy but he might deny it if you asked him ;) have been watching Little House on the Prairie quite a bit (I usually watch and then pick which ones she can watch as some are really intense and way too much for a 3 year old. I am pretty picky about what I allow her to watch.). We discovered our library has all of the seasons. I thought Peanut might fall in love with it and sure enough, she did. She loves Laura, Mary, Carrie and baby Grace.
Happy trick or treating!  Cora is Laura Ingalls.
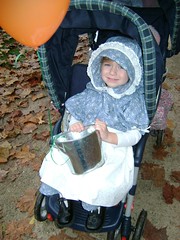
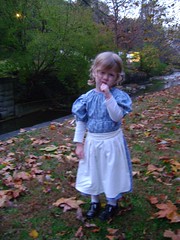
For her costume this year for Halloween I thought it would be fun to have her dress up as Laura and she LOVED the idea. I found a pattern for a prairie dress and bonnet, picked out some pretty blue and cream flower print, and got to work last week. Peanut was so excited about her Laura dress. This was my first experience at making a dress and really using a pattern by myself. Patterns are so tricky if you aren't really sure what you are doing. I certainly would not want an experienced seamstress to look at my work because when I wasn't sure what to do, I kind of did my own thing and made it work. I was tickled when I was finished and so was Peanut. I also learned that patterns run a bit big at least this one did. Oh well...she'll be able to play in it for quite a while.
Trick or Treat Trail
We got to test the dress out this past Friday night at a Trick or Treat trail at a local park. She was so excited to get dressed up and wear braids just like Laura. (Speaking of the braids, we just started watching Sesaon 7 (had to skip Season 6 as it was checked out) and Laura wears her hair up. Peanut noticed right away and said, "Mom, wear are her pony tails?" I think she likes the young Laura more than the older Laura.
Trick or Treat Trail
It felt so good to have my sewing machine out again. I haven't sewed in ages! Hoping to do some more stuff here and there.

Thursday, January 29, 2009

Getting My Creative On

I have a couple of things to share with you....

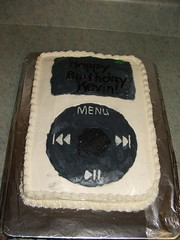
My hubby's birthday was this past Monday, so I decided to make him a fun birthday cake. Hubby is very much into the tech world. He is an Apple loving man, so in honor of his love for all things Apple, I made him his very own iPod birthday cake.
Happy Birthday Daddy
I was very happy with how it turned out. He got quite a kick out of it.

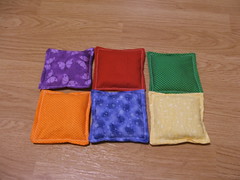
My daughter who is 2 1/2 has been needing some work when it comes to color recognition. Now being a 3 year old preschool teacher, I tend to analyze everything and am a bit concerned that we are not getting the colors down. (The teacher in me also says, "It's fine...she will get it, just keep plugging away!) I decided to make color bean bags for us to use to work on the colors. I used the tutorial that I found here. I did change the measurements just a bit and didn't use quite as much rice. I busted a needle on my sewing machine due to using too much rice. They turned out cute and we have had fun with them. In fact tonight the bean bags were used as cupcakes while my daughter had an imaginary birthday party for her and I.
Bean Bags
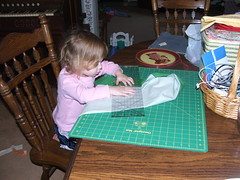
And I have to share this picture of my little one measuring her own fabric while I worked away on the bean bags. It was a proud moment.
Sewing

Monday, January 12, 2009

Some More Things to Share..


I wanted to share some pictures with you of the other item that I made for my daughter for Christmas. My mom passed away this past October after a VERY long battle with Alzheimer's Disease...over 10 years. My dad wasn't sure what to do with all of her nightgowns, so I took them. I decided I wanted to make a quilt for my little girl...Mimi's quilt. Now having just taken up sewing a few months ago, I went basic. I just cut out squares from the nightgowns and sewed those together. And instead of quilting it, I knotted it. My mother-in-law helped me with the binding which seemed a bid foreboding to me. She is an avid sewer and quilter and to whom I owe my new hobby of sewing to. I think the quilt turned out very nice. I even got a bit creative and cut out some of the pockets from her nightgowns to use on the quilt. Peanut, my daughter's nickname, can stick her little stuffed animals or other treasures in there.

I also wanted to show you something that my mother-in-law made for her younger grandchildren that have baby dolls. She found a website with patterns for American Girl doll quilts and made them. Isn't it adorable? I love it so much as does Peanut who likes to wrap her babies in it.


And just for fun....here is a picture of the snowman that my daughter and I made together today before naptime. She had fun learning about big, medium, and small. Her favorite part was adding the fun shape stickers to Mr. Snowman's body. He is proudly displayed on our fridge now.

Sunday, December 21, 2008

Hoot, Hoot

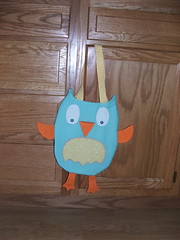
I am super, super, super excited to show you what I made for my daughter for Christmas. I sat down and worked like a mad woman on Friday night to get it done. I am pretty happy with how it turned out. I had seen the most adorable bag on the Little Birdie Secrets blog back in October and just knew I wanted to make my own version for my daughter. I can't wait to see her carrying it around with all her little treasures inside it. So here is the big unveil.....Ta Da!
Hoot Hoot
He even has a little clump of tail feathers on the back side. Heehee! Love him!

I had a good friend over yesterday for lunch. I love trying out new recipes when we are having guests. I had seen Rachael Ray make a super yummy Shepherd's Pie awhile back on her show, so I dug through her archives, found it and made it. Here is the recipe....

Stretch a Buck Ultimate Holiday Shepherd's Pie
  • 6 medium potatoes, peeled and cut into chunks
  • Salt
  • 2 tablespoons EVOO - Extra Virgin Olive Oil
  • 1 1/2 pounds coarsely ground sirloin
  • 1/2 pound cremini mushrooms, quartered
  • 2 carrots, peeled and chopped
  • 2 medium onions, chopped
  • 2 ribs celery, chopped
  • 1 bay leaf
  • 3 to 4 cloves garlic, finely chopped or grated
  • Ground black pepper
  • 9 to 10 sprigs (about 2 tablespoons) thyme leaves, removed from stems
  • 5 tablespoons butter, divided
  • 3 tablespoons flour
  • 4 cups beef stock, divided
  • 3 tablespoons Worcestershire sauce
  • 2 tablespoons grainy Dijon mustard
  • 1 cup frozen peas
  • 1 cup milk
  • 1 1/2 cups shredded Gruyere cheese, divided
  • 1/4 cup chives, chopped
  • 2 tablespoons prepared horseradish
  • 1 egg, beaten
  • 2 teaspoons paprika

Preheat broiler.

Place potatoes into a medium saucepan with a dash of salt and enough cold water to submerge them completely. Place the pan over medium-high heat and bring the liquid to a bubble. Reduce heat to medium and simmer the potatoes until tender, about 15 minutes. Drain the cooked potatoes and reserve them in the same pan they were cooked in.

While the potatoes are cooking, place a large, cast iron skillet over medium-high heat with 2 turns of the pan of EVOO, about 2 tablespoons. Add the ground sirloin to the pan and cook until browned, 5-6 minutes.

Add the mushrooms, carrots, onion, celery, bay leaf and garlic to the pan and season everything with some salt and pepper. Cook until the veggies are tender, 7-8 minutes, and then stir in the thyme leaves.

While the veggies are working, place a medium saucepan over medium heat and melt 3 tablespoons butter. Sprinkle the flour over the butter and cook for about 1 minute. Whisk 3 cups of the beef stock into the roux and simmer until thickened, 2-3 minutes. Whisk the Worcestershire and Dijon into the gravy. Season with salt and pepper and reserve warm.

When the veggies in the skillet are soft, add the remaining 1 cup of stock to the pan and stir to remove any bits stuck to the bottom and cook away most of that liquid. Remove the skillet from heat and stir in the peas. Stir the prepared gravy into the mixture and reserve.

Mash the cooked potatoes with the remaining 2 tablespoons butter, milk, about 1 cup shredded Gruyere, chives and horseradish. Stir the egg into the mixture at the very end and stir well to fully incorporate it. Season with salt and lots of pepper.

Slather the mashed potatoes over the mixture in the skillet and top with the remaining Gruyere cheese. Place under the broiler to brown.

Garnish the shepherd's pie with paprika and serve straight from the skillet.


It was super yummy and pretty easy! I couldn't find the Gruyere cheese, so I used Monterey Jack and that worked fine. And I LOVED the horseradish in the mashed potatoes and might have to do that for Christmas. It gave it a yummy zing! I wouldn't add so much beef stock to the veggie/meat mixture next time. The stock didn't cook down like it said it would and it made it a bit soupy...but with the mashed potatoes on top, it was fine. I think you should all make this one soon.


Thursday, July 31, 2008

Birthday Makings

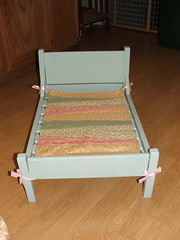
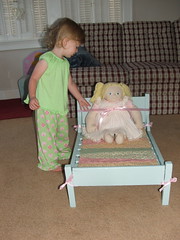
My little girl turned 2 this week. In honor of her birthday and my new addiction to sewing, I made her some things for her special day. The first was a scrappy quilt to go on a baby doll bed that belonged to my mom when she was a little girl. The bed had been made by my great uncle for her. I remember playing with the same bed when I was a little girl. It was an ugly brown color and in desperate need of a new paint job. I painted it a pretty pale blue and made a quilt to go on the top of it. I also dug out my own baby doll, Suzie to give to my daughter. Here are some pics of the bed, doll, and Peanut with them.
Baby Bed Happy 2nd Birthday!
I also made her very own apron. I found a great tutorial online. It was so easy. The only thing I did was add a pocket and a bow. I really wish I had put ric-rac around the pocket but Peanut was sick when I made it so I couldn't get to the craft store and I needed to get it done. Next time!
Apron
And for her cake I made a cute cow cake. I got the directions from the Family Fun website. I love, love, love that magazine. I need a subscription to it! Thankfully I can get free ideas off the site. Peanut is really into farm things so that is why she got a cow cake! She really liked it. The only candy that I used was Whoppers. The directions called for alot more, but I just used colored frosting instead.
Happy 2nd Birthday!

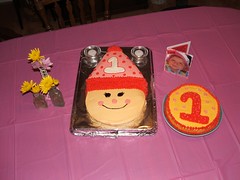
I really enjoy making cakes, but am glad that I only do it like once a year. Heehee. Here is a picture of the cakes I made for Peanut's 1st birthday.
B-day Party
I am so glad that I am able to make things for my little girl. Homemade things have that extra special feeling to them. I am so grateful to my mama-in-law for getting me going on the sewing. I really didn't think I had it in me. She's pretty cool, that mama-in-law! I love her lots.

Sunday, July 13, 2008

Murphy's

I'm back. I told you I would be. No hubby to steal my computer time. Ha! In my blog break, I scrubbed my cabinet fronts with Murphy's Oil and water. I hate the smell of Murphy's Oil. I don't know why because it is synonymous to the smell of clean. Or is it synonymous with the dying of brain cells from the chemicals in those products. Have any of you tried the green cleaning products? What do you think? What do you like? I've been wanting to try out the Clorox line of Greenworks. I just haven't run out of what I am already using and I do NOT waste cleaning products. I use up every bit of it. I turn the bottle upside down and then shake some water in it to get it ALL! That's so fun when the toothpaste is running out. I'm so joking! I don't do that with the toothpaste but I do squeeze the dickens out of it.

Now onto sewing. The reason I bring up Murphy's and sewing....it does come together, really. My parents had this old shelf that sat in their bathroom for as long as I can remember. It stored towels and different items. My dad took it out to the shed a few years back to make more room in their tiny bathroom. Yesterday, I stole it from them! I asked first! Ha! I needed somewhere to put my sewing things. Sewing has taken over my dining room. This shelf is perfect. It sits just inside my laundry room and can house my sewing things neatly in cute baskets and such. But after having spent a few years in the shed it needed a good scrubbing down with the Murphy's. Now it is clean and in place. Yeah for me! Now I need to make it cute with doilies and such. Here is a picture for now of what it looks like. And yes, that is the litter box there. Sorry!


As for sewing....I have been have a heyday with those fabric baskets from Pink Penguin's blog. They are so fun to make! It is so fun to pick out the different fabrics to put together. I love vintage fabric so many of mine are made out of the vintage stuff. I have made some others too. I can usually whip one out in an hour after I have everything cut out. I try to cut extra when I'm cutting so I have some ready to go when I don't have time to cut. Aren't they so cute?


I have also been working on a new tote style. It isn't finished so I don't have a picture yet. I'll try to finish it and get a picture up soon. My sewing machine was giving me fits on Friday so I haven't been back at it since. I hope it was just the day and I'm not going to start having problems with it. That would make me sad!

My latest project will involve handmade things for my daughter's 2 year old birthday. I'm excited, but it's a secret, so shhhh...don't tell!

Sunday, June 29, 2008

Comments

I left a comment on Pink Penguin's blog about making her fabric basket. Today I visited her site and viewed her comments to find she had responded to mine. Now I think she is very talented so I don't take her kind words lightly. This is what she said:
"Daisy Path-
I went to see your baskets! Oh my! are you sure you got your sewing machine just recently?! You're talented! Your baskets are awesome! When I started sewing for the first time, the only thing I could do was to make very simple coasters. It took me 2 hours to make a coaster!"

Wow! She also left a comment on my blog:
"I like your little fabric basket! I like how you used fabric that is vintage-ish so that the result is kinda retro- I love it! And thanks for your kind words on my tutorial;) I might make another tutorial just like this fabric basket..;)"

Now I appreciate everyone's kind words but here is someone who doesn't know me from Adam. You all know me so I expect kind words from you. Ha! Thank you to everyone for your encouragement in my sewing venture. It has been fun.

Thursday, June 26, 2008

Fabric Basket


I'm in Heaven. This is the cutest little thing EVER. I am so proud of my little project that I made during Peanut's nap today. It took me a little longer than naptime but Daddy's home and he let me finish. I did things like make box corners and bias tape for this one. Wow! I didn't have a clue but the awesome tutorial that I followed was wonderful. I think I want to crank out a bunch of these. They are perfect for gifts and baby nurseries and such. So, so, so, so cute and really not too hard. You can find the tutorial here at the Pink Penguin blog.

I have had so many of you comment about having sewing machines but not sewing. Pull that puppy out, dust it off and try. I sewed in high school for home economics class. Then around 2001 my mother-in-law helped me start a quilt for our bed but I never finished. Her mom actually finished it up for me, then mama-in-law quilted it. So it was kind of nice....all of our hands worked on it. But I haven't sewed since! And now I look forward to making things. It may be the newness of it all but there is something so rewarding about making something with your own hands.

I know a great teacher if any of you want one! She is my personal sewing trainer! Ha!

Blast from the Past


This morning my daughter discovered Mama's books. I have a stack of books from my growing up days in the back of her toy cabinet. She has never gone through them until now. She had them all spread out around her and we spent some time reading through them. Half of the stack are my Little Golden Books. Oh, the memories came flooding back of when I was little and looking through them. The pictures are so beautiful in some of them. I had to share a couple with you! There are many more but these are some of my favorites.


Now onto bags! I tried to make a bag last night using some bamboo handles. I don't know....the handles and my sewing machine did not get along well. It was really difficult to keep the handles in place and sew. And even more exceedingly difficult to do the second handle because the first handle wouldn't fit in the space between the needle and the machine. I think I am going to have finish it by hand but am going to the mama-in-law for advice. Ha! It was late and I was tired so I'm not sure that I am all too happy with the turn out of this one. We'll see. Maybe it will grow on me. This is from the same pattern as the first bag I made....Simplicity Pattern #5151.

I checked a neat book out from the library about making quilted bags. There is the cutest patchwork tote with handles in it. It is all embellished with ric-rac and buttons. I want to try to make that one too. I need to see if my kind mama-in-law will let me go through her bits and pieces of fabric to find some pieces that go well together. We'll see.